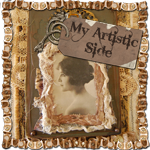
As you can see, I am not done. I wanted to gather more items I had here at home to finish the inside pages. You just can't take it all with you when you do a workshop. Pity!!

 This vintage orange velvet corsage is attached to a tiny doily piece. I tied long threads to it to hang down like a ribbon from the corsage.
 The fridge is fixed! The repairman found the problem (bad capacitor, relay and overload parts) right away and had it running again in a matter of minutes. And he even had the repair parts on his truck! Can you imagine that??!! I lost most of the items in the freezer. However, the entire fridge is now clean inside and the food that couldn't be salvaged is gone. Feels like new!

 The piece of black fabric is velvet that has a pattern on it. There is a name for that, but I can't think of it now (embossed velvet??). That is all I have of this velvet. Drat! It really is a pretty piece. Discovered that and the ticking in my stash. The ticking is a very small piece, too! Another drat because I love the color. And coffee stained it will be great!
 Kim, Kim, Kim!!!! Thanks ever so much for this grand fan!! I absolutely love it! I hope that this weekend I will be able to scour Mesa to see if I can come across more of this good stuff! You have much better luck than I do!
 The fan rests against the wire dress form on a cedar chest that my dad made when he was in high school. The dress form has a vintage lace collar, a vintage corsage (pink rose, of course!), pearls and a light pink ribbon tied in a bow. I love this! Thanks, Kim!!!